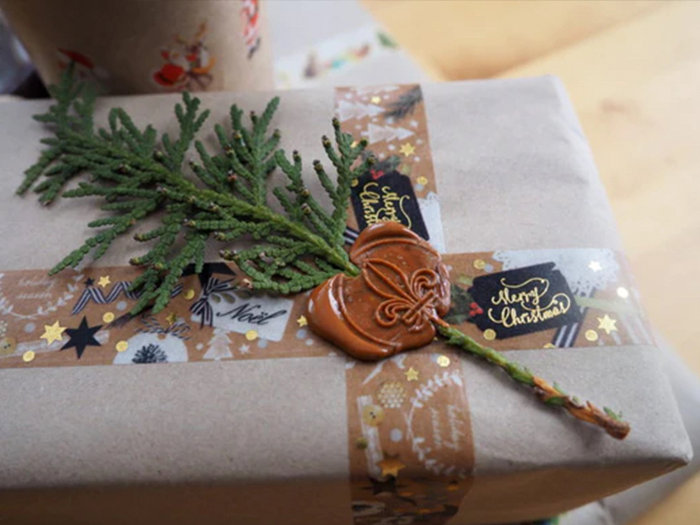
Wax seals were used traditionally to convey intimacy on special occasions. For weddings, wax seals adorned stationery and decor,symbolizing the couple's union. Pressing their seal into molten wax allowed the bride and groom to leave a lasting, decorative imprint of their love.
In ancient times, wax seals are used to verify the letter is unopened or to verify the sender's identity. Since the advent of a postal system, the use of seal wax has become more for ceremony and decoration.
All you need is...
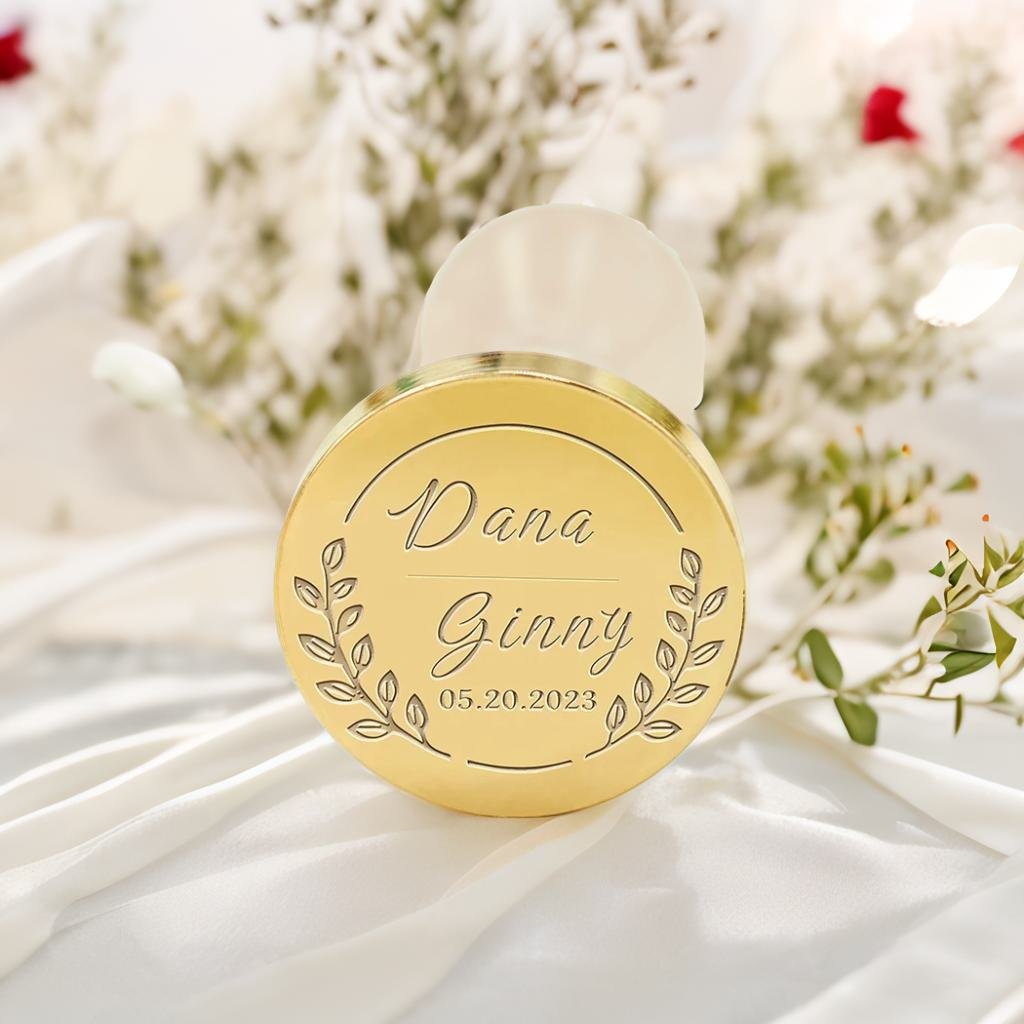
Wedding Wax Seal Stamp
A wax seal stamp for wedding invitation usually consists of bride's and groom's names or initials, sometimes the wedding date, decorations like loving birds, flowers, and laurels. If you haven't got one, order your wedding wax seal stamp now at our shop.
Sealing Wax Beads
Traditional sealing wax color is red or Burgundy but for wedding invitations, you can choose what best fit your wedding theme. Pastel colors like pink, light purple, cream are some of the popular ones. If you are using wax beads from our ship, 2 or 3 beads can make 1 seal.
Melting Spoon
We provide 3 types of melting spoon: the metallic melting spoon, the vintage melting spoon and the large melting spoon. Since you probably need to make dozens of seals, I would recommend using the biggest one ideal for melting enough beads in large batches.
Candles
Any candles can do, be it tea lights, pillars or votives.
How It Works:
- Place 2-3 wax beads onto a metal spoon and heat gently from below using a candle. Don't overheat the wax, or there will be some bubbles on the surface.
- Quickly pour the melted wax onto the envelope.
- Make sure the design of your seal is right side up. Press your stamp firmly into the wax and hold for 10 to 15 seconds.
- Once the wax has cooled, you will be able to lift the stamp out cleanly with very little effort.
- Repeat step 1 to 4 to seal the rest of your invitations. Wipe the remaining wax off the spoon before it cools when you finish.
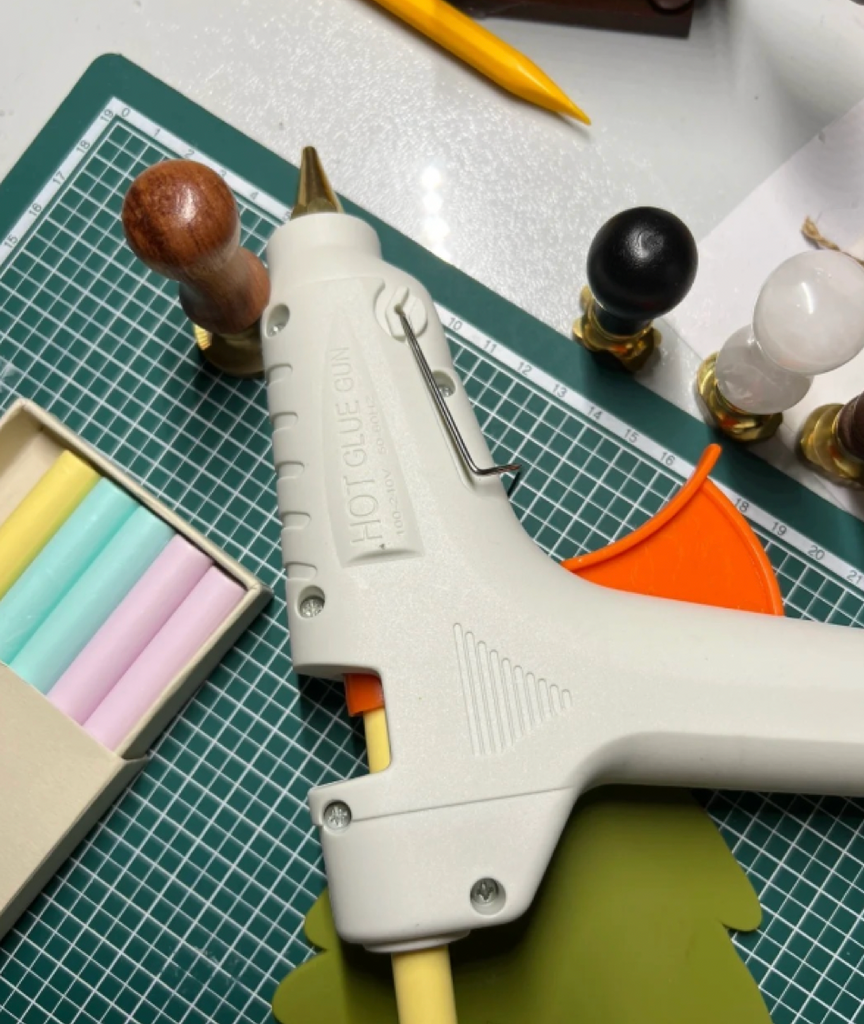
Alternatively, you can resort to a more modern method: glue gun sealing wax. Production times for glue gun methods are almost ten times faster than traditional wax methods. You will need:
Sealing Wax Glue Gun
Standard glue gun also works.
Glue Gun Sealing Wax Sticks
Choose the size fits your glue gun. We provide both 7mm and 10mm glue gun sealing wax sticks. One wax stick will create approximately 9 seals with a 25mm (1") wax stamp, 7 seals with a 30mm (1.2") wax stamp.
How It Works:
- Insert 2 wax sticks into the glue gun.
- Heat up the glue gun with the wax inside for about 5-8 minutes.
- Pull the trigger to release the desired amount of wax onto your project and wait 5 to 10 seconds.
- Press down the stamp on the hot wax.
- Let the stamp set for a few seconds before lifting from the wax.
- When changing wax colors with a glue gun, the old color will mix with the new one for a couple of pull. I suggest dedicating one glue gun to one color.
That is not all! Wax seals can be used not only on wedding invitations but also on menus, champagne glasses, wine bottles and many other occasions on your wedding reception, especially when you use the glue gun sealing wax. Check them out:

Find more information and products on wedding invitation wax seals at AMZDeco.com. Tell us in the comment section what you want to know about wax seals.